Setting up Signal House for GoHighLevel! 🚀
This article is a deep-dive with everything you need to know to setup your Signal House account with GoHighLevel. Follow these steps and you'll be sending messages in no time! 😎
Agency Level - Adding a Card and Selecting a Plan
After a quick refresh once the app is installed, you're ready for the first step: getting a plan selected! Before we can do that, however, we need to get your card on file.
Doing so is incredibly easy, however! Just navigate in the Agency view to Signal House > Wallet > Add Payment Method
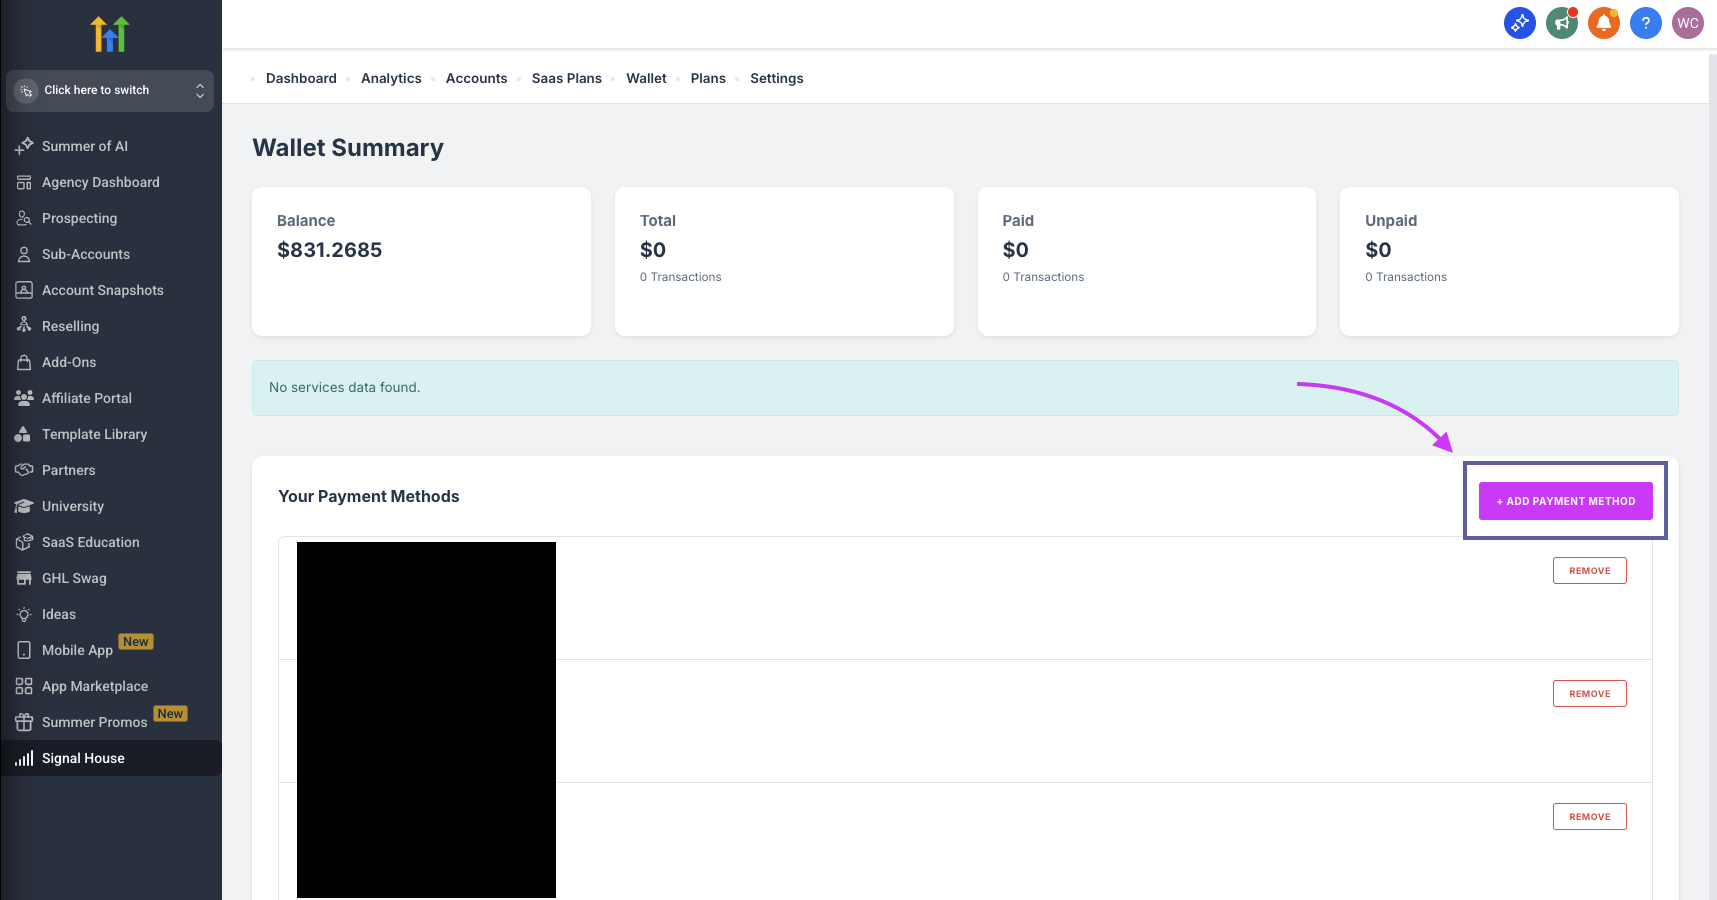
Once you do, simply add your payment method and select your country, state (or region, if outside the US), and city:
➡️ ➡️ ➡️ Pro Tip: Need help? Click the pink button in the bottom right hand corner ↗️. Our team is there from 9 am to 6pm ET to answer any questions you may have 😎🙌
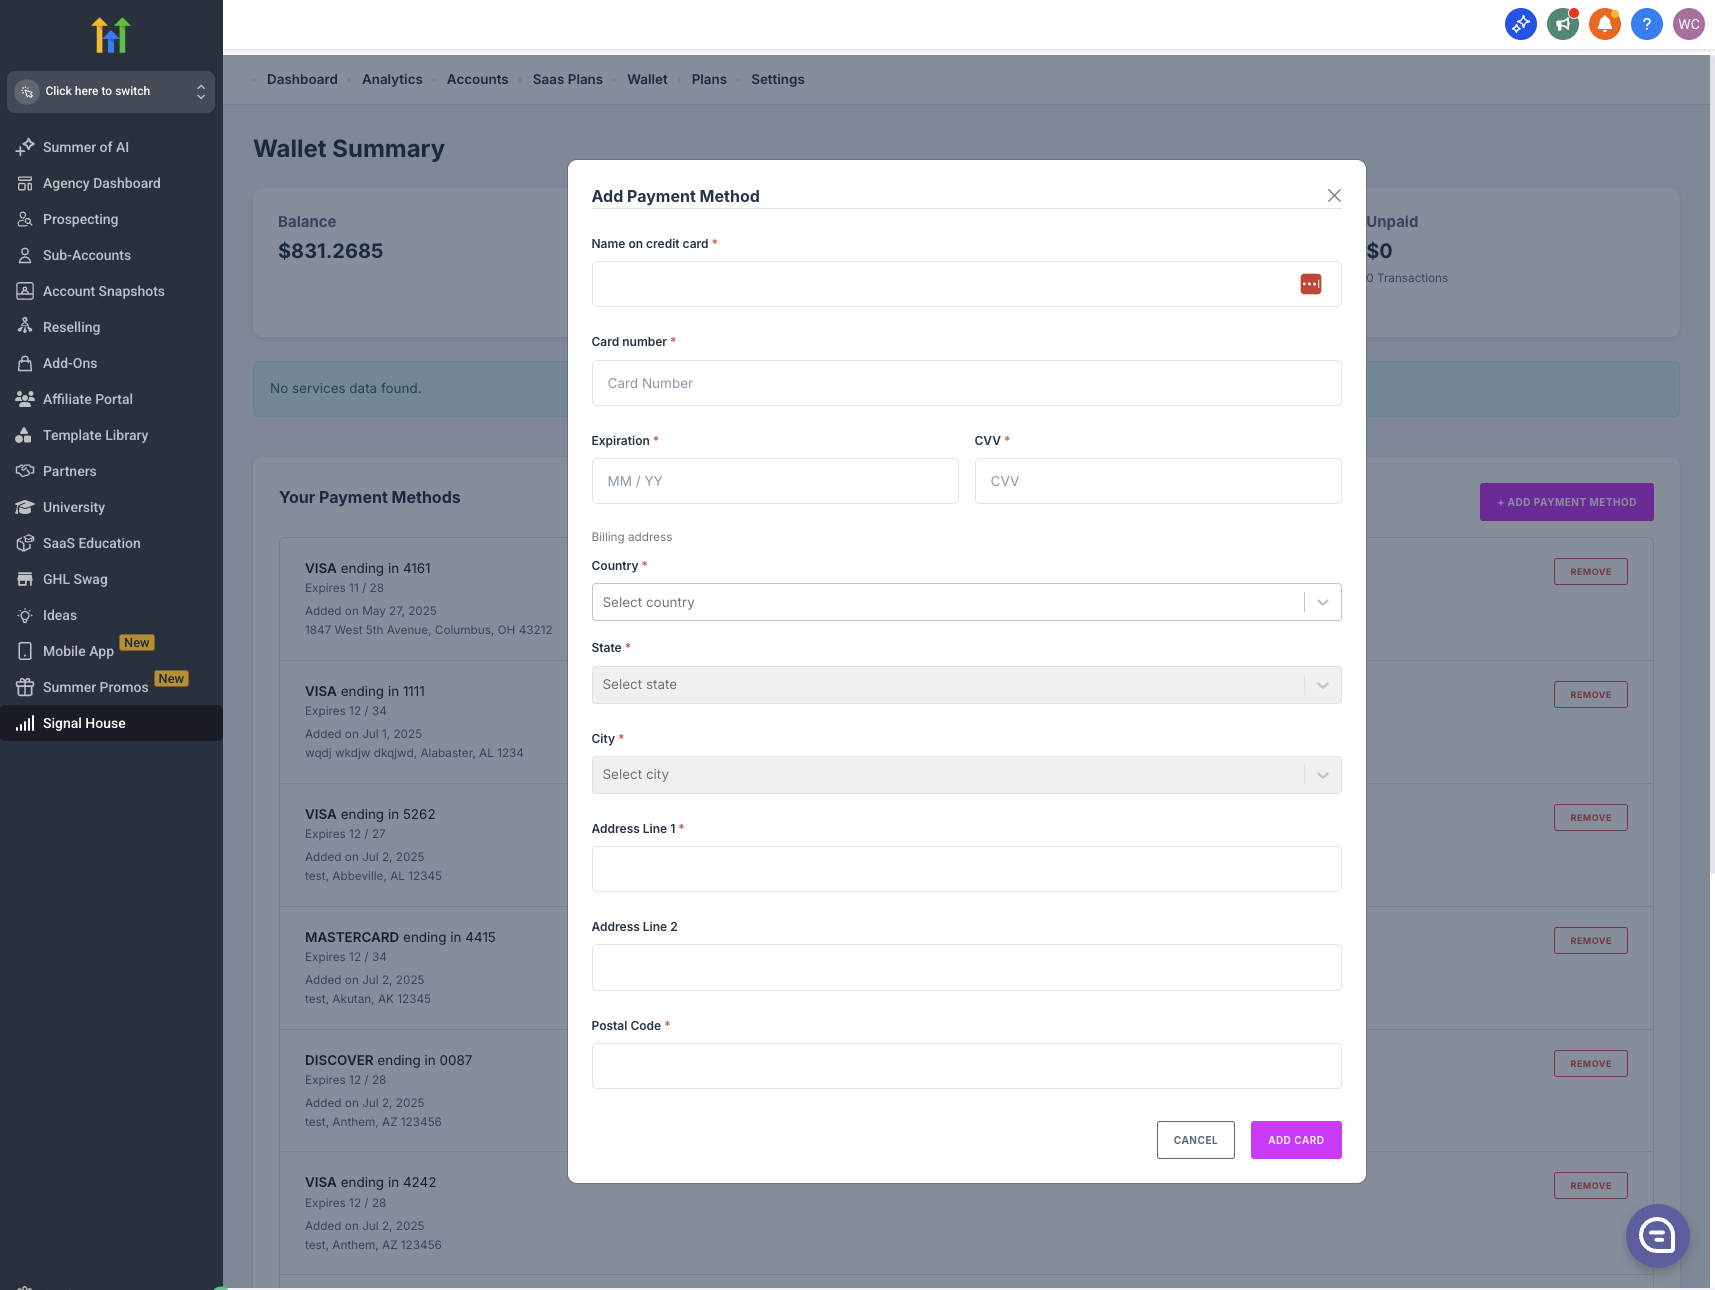
Selecting a Plan
Now that you have a card on file, you're ready to select a plan!
To do so, simply click on "Plans" at the same Agency Level, and then select the one that best fits your use case:
Not sure which plan to choose? 🤔 Use the guide below based on your monthly usage 👇
🥉 0-10,000 SMS segments/month: $20 or $50 tier
🥈 10,001-100,000 SMS segments/month: $50 or $100 tier
🥇 100,001-1M SMS segments/month: $1,000 or $2,500 tier
*For 1M and above ask about our custom plans 🤫👀
Optional: Setting Up SaaS Plans for Agency Rebilling
Looking to rebill your SMS usage and profit from Signal House?! 🦻😳 Check out this article ➡️ Creating SaaS plans on Signal House
Exploring your Agency View:
👉 Installing into more Subaccounts
Sub-Account Setup - Where the Magic Happens 🪄✨
Submitting your First Brand:
Submitting a brand is as simple as typing/pasting in a bit of company-specific information:
Step 1: Open Signal House in GHL
Go to your GHL dashboard.
On the left sidebar, click “Signal House”.
Navigate to the “Brands” section.
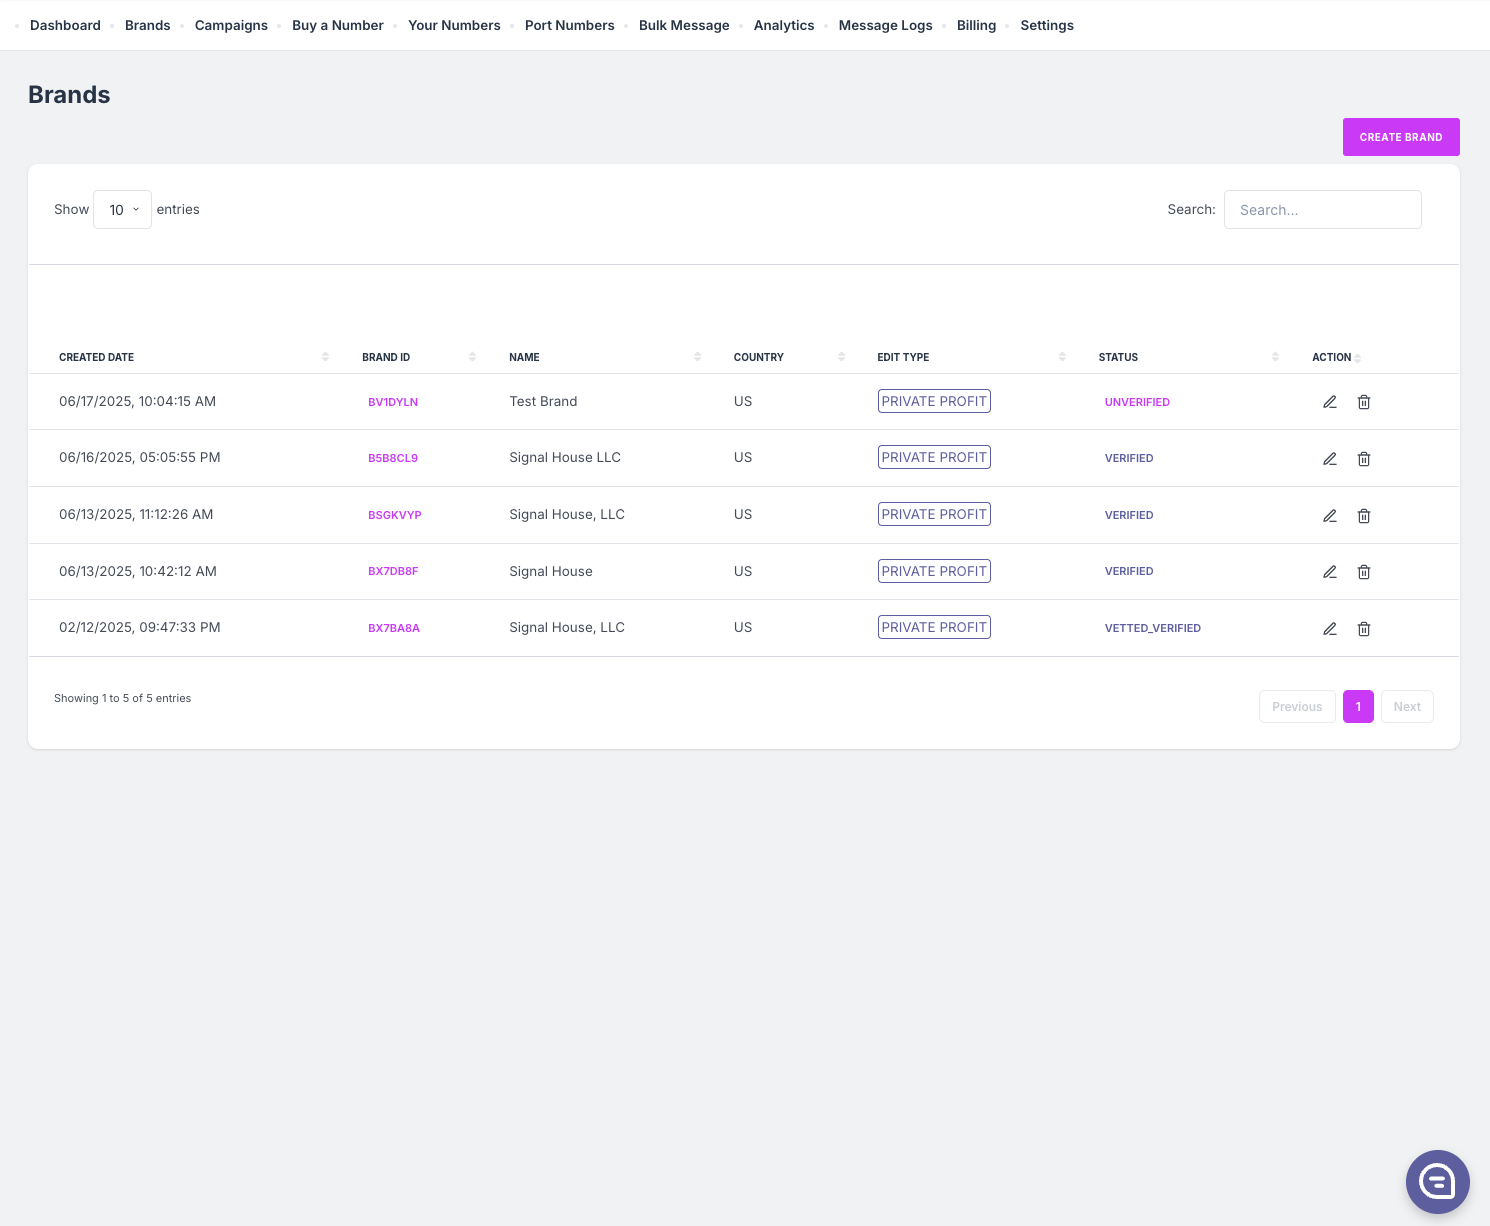
Yours will of course be blank because you haven't submitted any brands; however, this will soon change 🙂
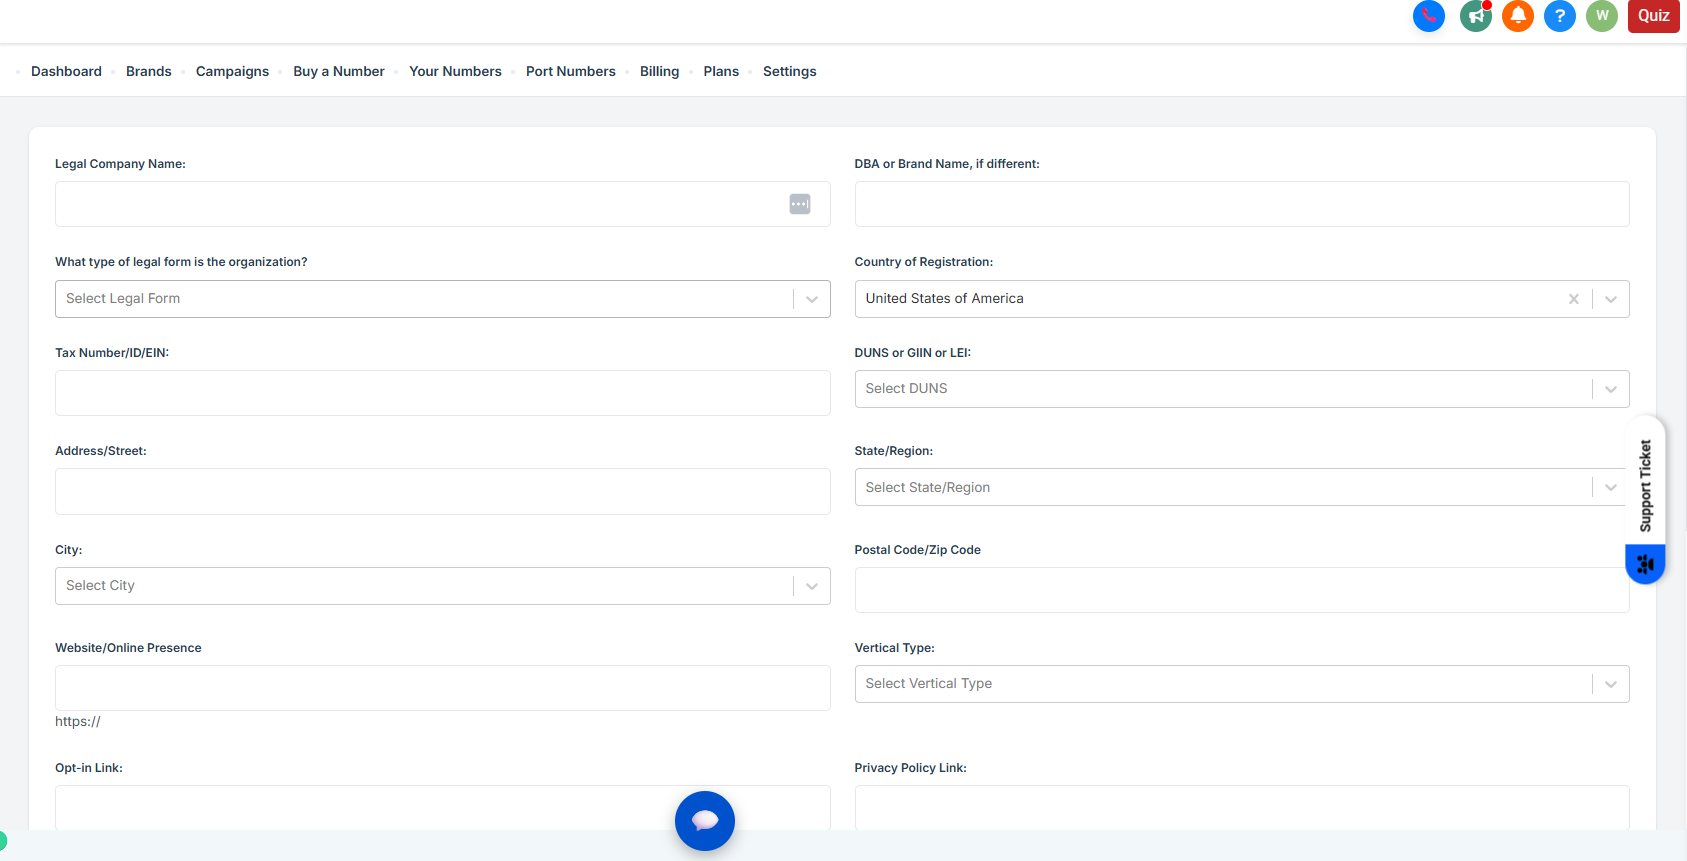
Step 2: Create a New Brand
Click the “+ New Brand” button.
Fill in the required fields:
Brand Name → e.g., Signal House
Company Type → e.g., Profit, Non-Profit, Government
Country → Usually “United States”
State & City → Select your business location (e.g., Ohio → Westerville)
EIN → Your company's Tax ID. As a business owner, you can find this on your W9 or SS-4. As an employee, you can find this on your W2.
Note, Signal House does not today support Sole Proprietors. This is changing very quickly, however (Q3, 2025)
Another note: If you are a foreign company, your brand will most likely fail. That's not a problem! Reach out to support with your tax information, and we'll appeal the rejection on your behalf 🙂
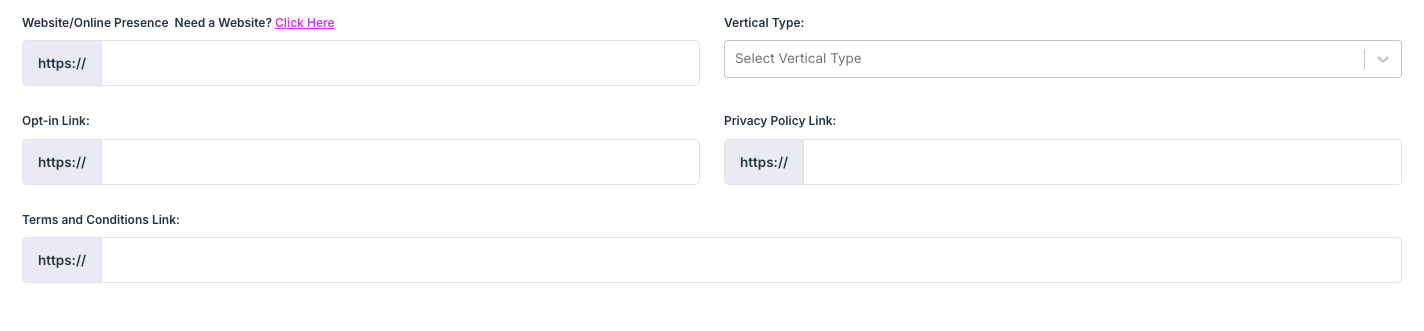
Step 3: Create a Compliant 10DLC Landing Page 🎨
Next to Website/Online presence, select the "Click Here" button to launch our free compliant landing page builder:
This will open our page designer, where you have the ability to choose your background and font color schemes, attach a logo, and and give Signal House permission to create the site 👇
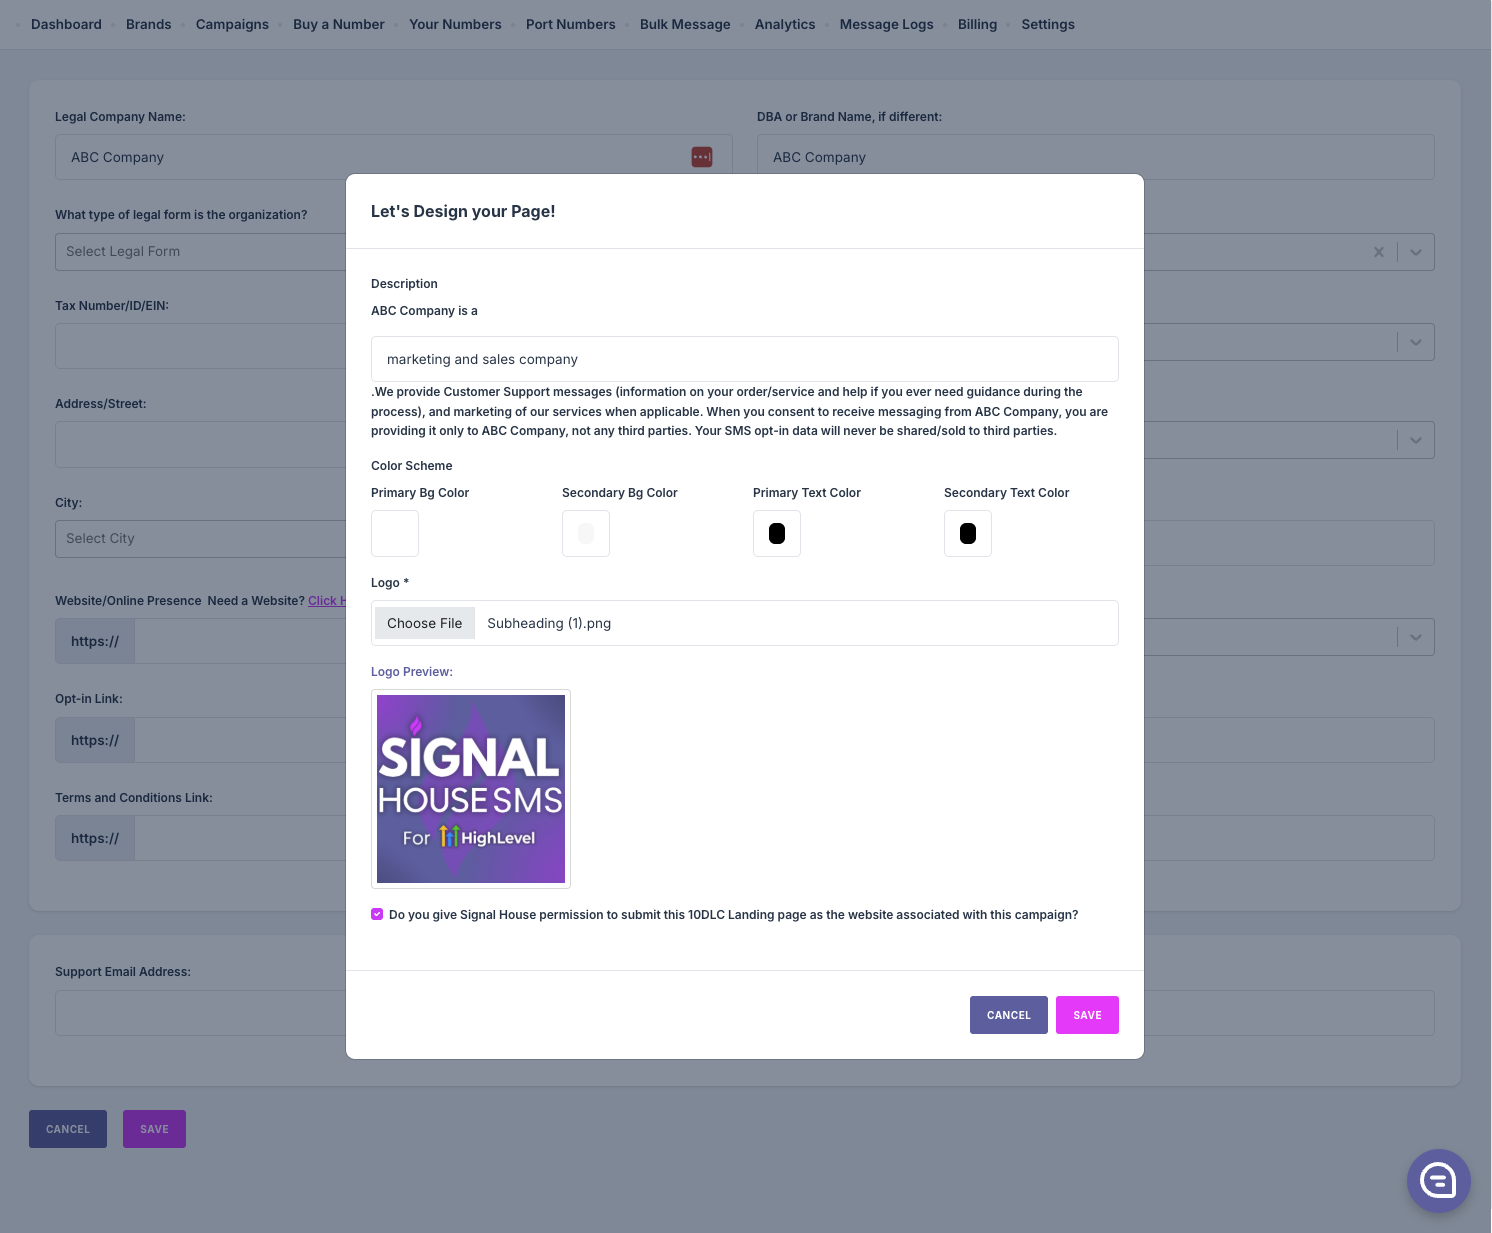
➡️ ➡️ ➡️ Note: It'll be a subdomain on our domain. Example: abc-company.signalhouse.io/intake/LNM4IZQ
👉 Pro Tip: When a contact adds their information to the form, it will actually add them to your GHL account automatically! 🪄
Step 4: Click Submit! ✅
Once the brand is fully filled out, hit "Save" at the bottom:
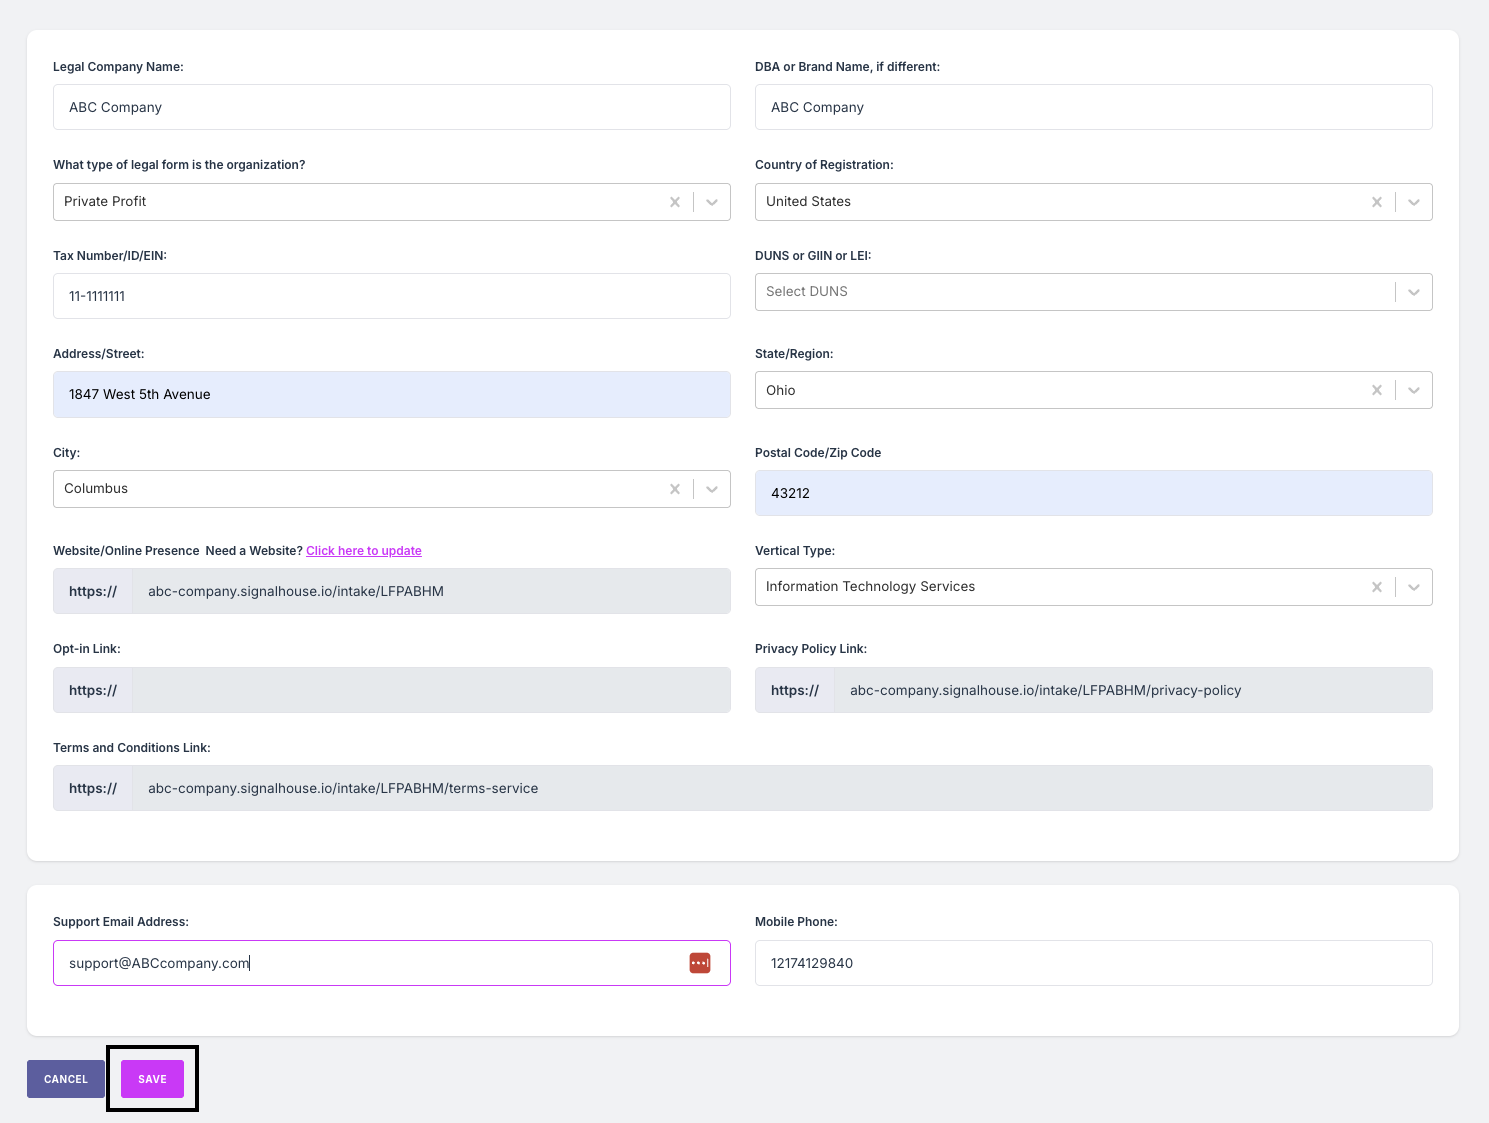
👉 Pro Tip: Your support email domain needs to match the Brand name that you're registering. For example, support@abccompany.com
Once your brand is submitted it will be in a "Pending" status. After 2-3 mins that'll update to:
➡️ ➡️ ➡️ Unverified
The EIN (tax ID) did not match the Legal Company Name and/or Legal Form (private, public, nonprofit, etc). Reach out to support with the SS4 document in this case.
➡️ ➡️ ➡️ Verified
You're ready to Purchase a Number and Create a Campaign!
Buying a Phone Number
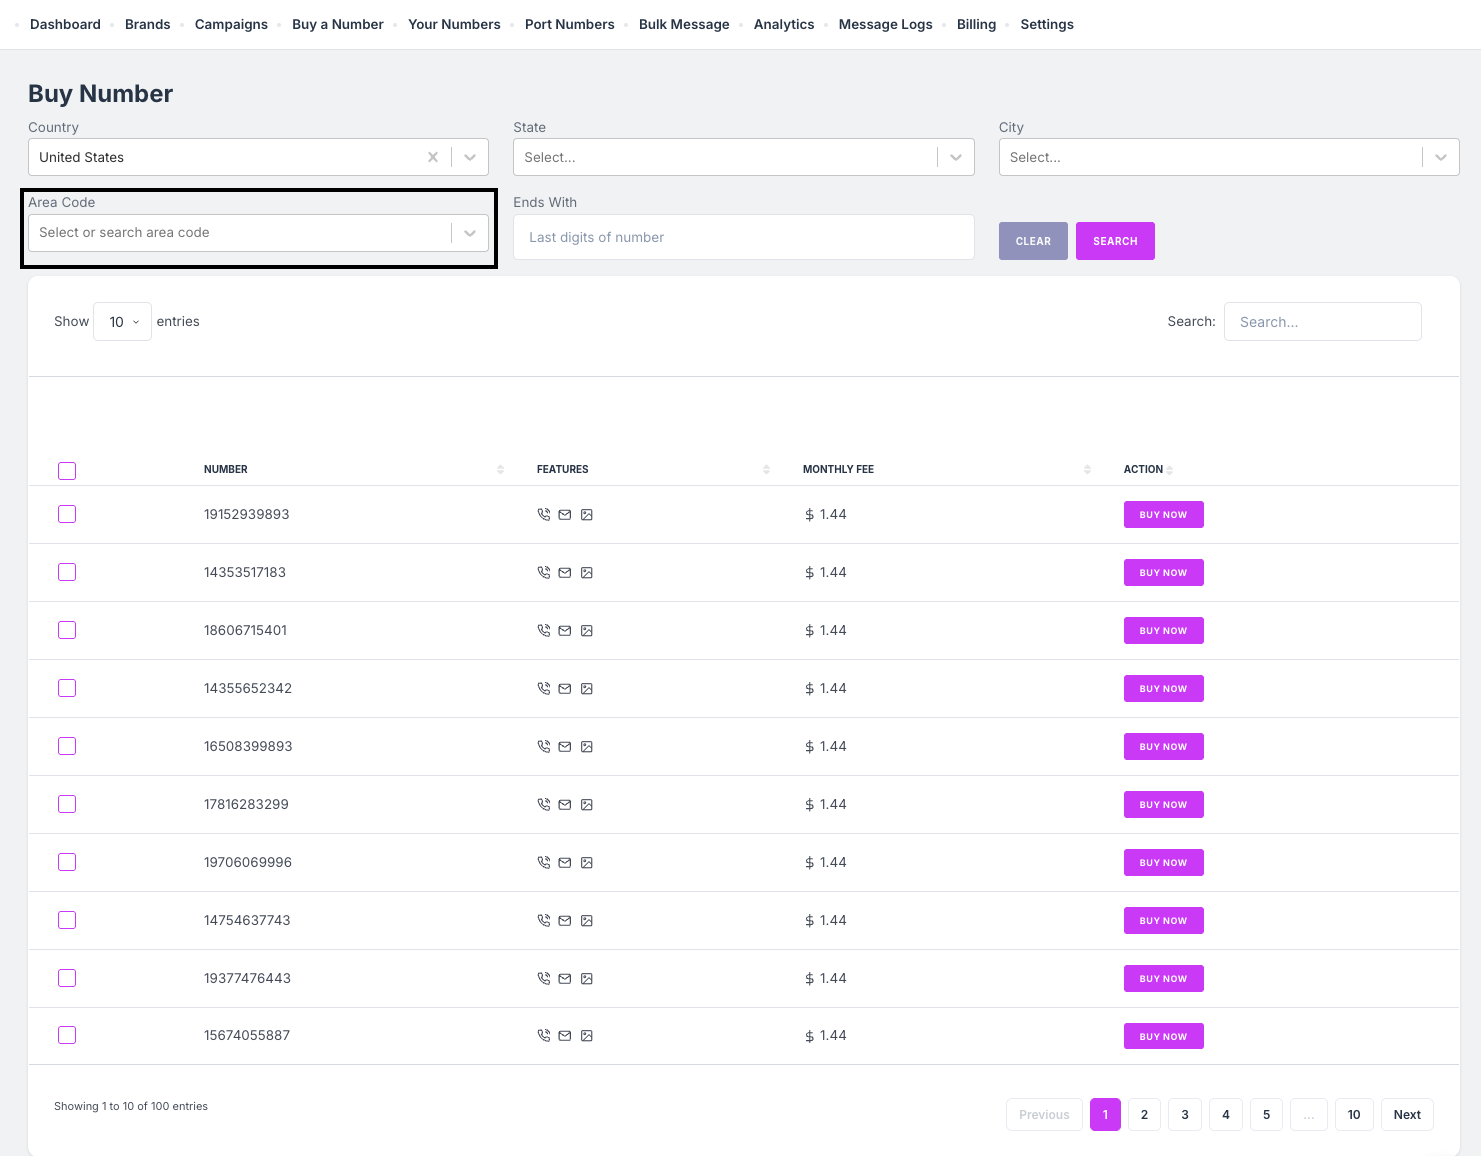
Navigate to "Buy a Number," and type in your area code to find a number in your location:
Either click "Buy Now" or use the tick-boxes on the left-hand side to select additional numbers. Once selected, hit "Yes" in the subsequent screen to complete the purchase:
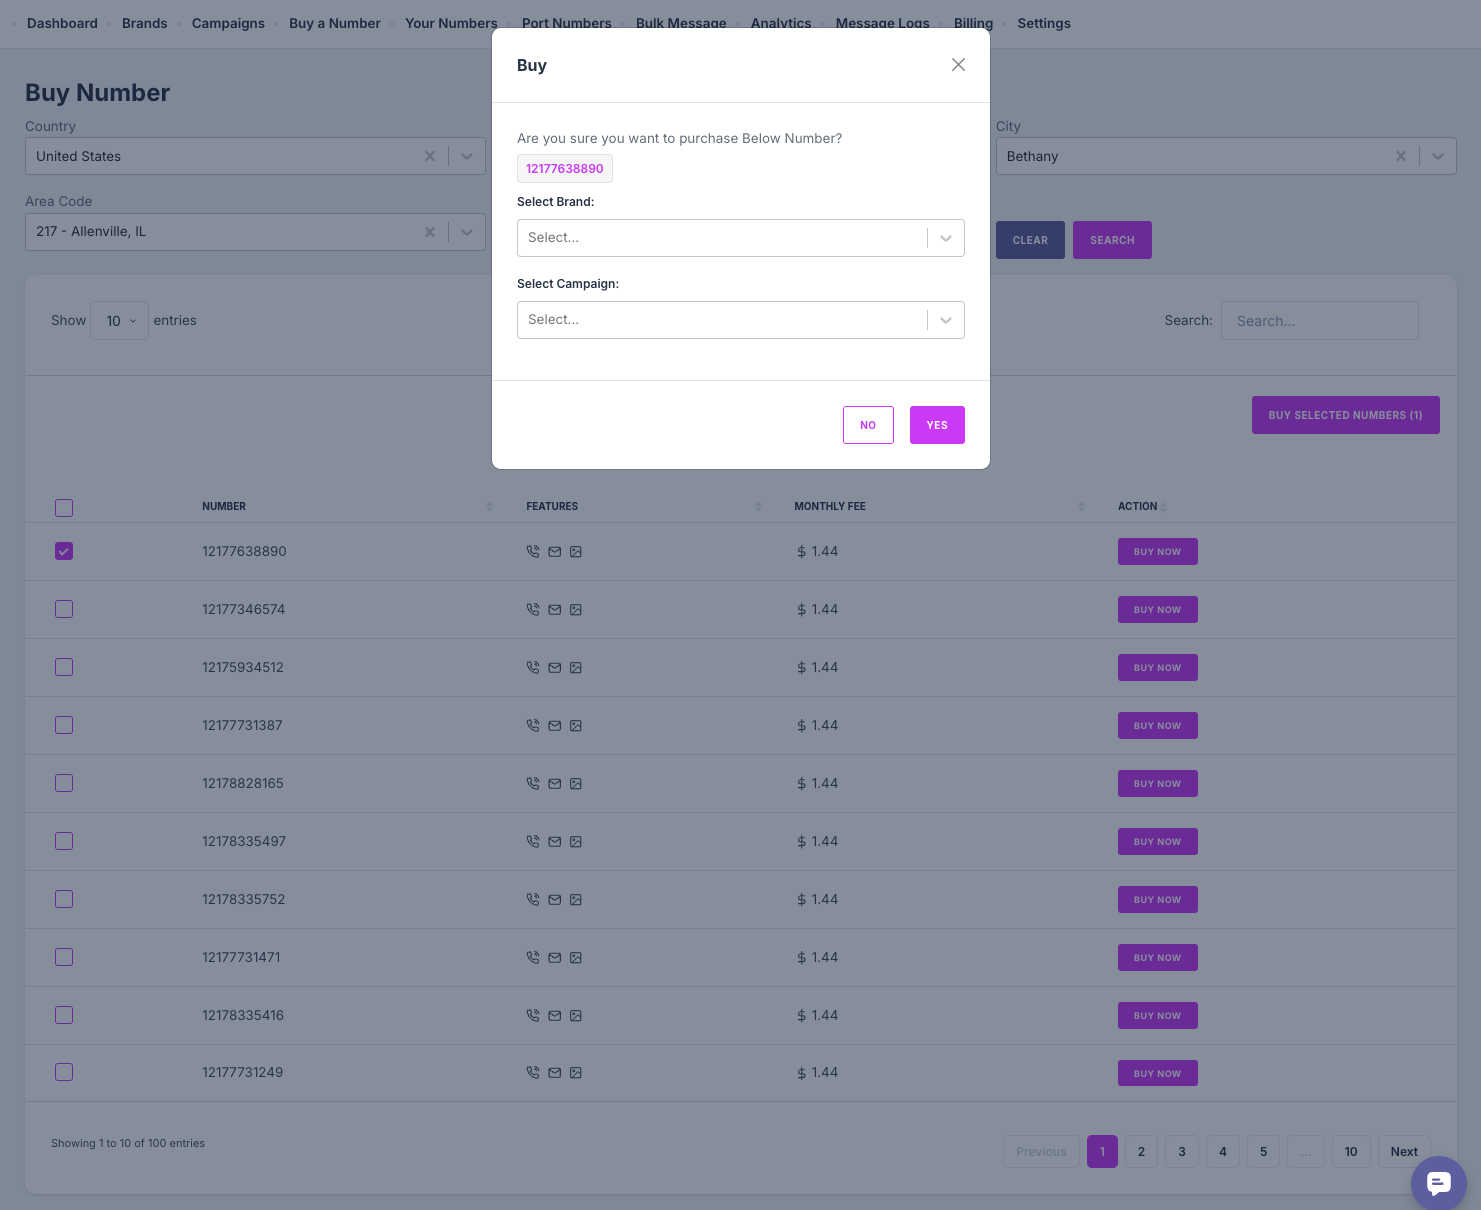
👉 Note: You can leave the "Brand" and "Campaign" section blank. We'll add this number to the campaign we create in the next step 🙂
Creating a Campaign
1. Navigate to Campaign Section
Go to the Signal House tab in your GHL left-side panel.
Click on Campaigns from the top bar.
2. Create a New Campaign
Click on the “+ Create Campaign” button.
Select your registered Brand from the dropdown.
Select a Standard, Special, or Low Volume Campaign
Choose one or more Campaign Use Case(s) (e.g., Marketing, Customer Care, Account Notifications, 2FA).
Need help choosing? Use Case Help
3. Use a Signal House Landing Page (Optional)
Note: If you've created a landing page at the Brand step, you can skip to 4!
After you've selected your campaign use case(s) and selected "next," you're taken to a page asking if the website submitted during Brand registration is 10DLC A2P Compliant
💡 Pro Tip: If you're not sure, watch the video linked in the module, and check out our Campaign Approval Bible!
If your website is approvable, go ahead and select "My website is approvable." If not, select "Help me make my website compliant."
You'll then be asked if you'd like us to create you a free compliant landing page > click Yes!
You'll then be prompted to add some information about your business, including a brief description, your color scheme, and your logo.
After clicking next, you'll be able to view your very own custom landing page!
💡 Pro Tip: Every lead who uses this ladning page will automatically be added to your Contacts list, with whether they consented to Marketing or Non-Marketing messaging use cases—compliance made easy 🧠😮💨
Once you're satisfied with the look and feel of your landing page, hit next! 💅🏼
4. Review Campaign Details
When moving to the next screen, you'll notice we've automatically generated a campaign submission, including the:
Description
Call to Action / Message Flow (describing how a user opts in)
Sample Messages
Opt In
Opt Out
Help
Note: You'll see a selection for "Age gated content." In this context age-gated content refers to Alcohol, Tobacco, and Firearms messaging. If you're unsure, ask our team if you should use this. Generally, however, the answer is no.
Once you've reviewed the selections, add a phone number you've purchased to the campaign (or purchase a number!), submit!
🔍 Campaign Status Tracking
You can monitor your campaign status inside the Campaigns tab
After submission, your campaign will have a Temporary ID while undergoing Signal House Review. This is just a final check by our team that campaign submissions will be approved by our upstream team first-try.
This review is same day, so will not affect our 48-hour review SLA.
Signal House Review
You'll see this status as soon as the campaign is submitted; our team reviews each campaign to ensure it's approvable before sending upstream. Our review is same-day.
Signal House Rejected
This status will rarely ever be used. If there is an issue with the campaign that needs to be adjusted before sending upstream, we'll inform you/request to make the adjustment ourselves.
Signal House Pending Appeal
If a campaign is rejected by Signal House (again, this is extremely rare), once resubmitted it would be in this status until either Approved or again Rejected by our Signal House Team
Signal House Approved
This status means the campaign is approved, but does not have a phone number attached to it. You'll notice a tooltip next to the status saying: "Add a phone number to this campaign to finalize your submission." Simply configure a number onto this campaign and it will automatically update to Pending, and will receive its Active Campaign ID
Pending
This status refers to campaigns that are pending review by our upstream partners, termed the DCAs. This process takes at most 48 hours. We offer a 48-hour SLA to our customers, because we've contracted a 48-hour SLA with our upstream providers (and since we automate our submissions, you'll see approvals in 48 hours 😎)
Rejected
This means your campaign was unfortunately rejected by our upstream providers. If this occurs, our team will know as soon as you do, and we'll proactively work to understand why the rejection occurred, and how to overcome it. We'll come to you with a solution same-day, guaranteed.
Pending Appeal
Once necessary changes are made, you'll resubmit the campaign, and it will be in this status until Approved by the DCA and carriers.
Approved
Woohoo! 🎊🎉🍾 Your campaign is approved! You can now send out traffic to your customers 🙌.
Click Here to learn more about Campaign throughput and use cases!